Installing Ethernet in the House
Wire your house for data
by Lorenz Prem
Installing wired internet in your home is not difficult. Snaking wires behind the walls takes time, but the installation procedure is very straight forward. There is no reason to hire an electrician for this job. Any handyman or homeowner can get this done.
Parts
The parts required for the installation are readily available on the internet. Resellers like www.monoprice.com offer prices significantly cheaper than the home stores. Your shopping list is amazingly short.
- 1 x Patch panel
- outlets x Keystone faceplates
- outlets x Keystone Ethernet inserts
- outlets x 2-3ft Ethernet patch cable
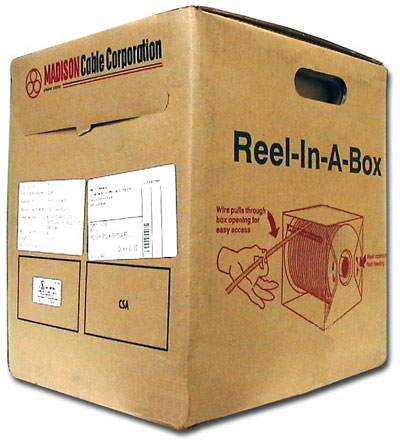
- 1 x bulk in-wall ethernet cable
Which cable to use
Ethernet cables come in different grades. The most common ones are Cat 5, Cat 5e, and Cat 6. The higher the cable number, the faster the transmission rate the cable supports. Cat 5 will support anything you can do with a computer today. Cat 6 is built for the future. Since it is only slightly more expensive than Cat 5, Cat 6 is the prudent choice for most users. Cat 5e is not necessarily better than Cat 5 and should be avoided (More about Cat 5 on Wikipedia).
Cables are further distinguished by subtype:
- Normal cable without a subtype: should only be installed horizontally
- Riser: can be used everywhere a normal cable is used and between floors (vertical installation)
- Plenum: Can be used in spaces with flowing air such as heating ducts
Given that a residential installation will most likely include at least some vertical sections, buying riser cable or better is recommended. Solid cable is used for permanent installations. Stranded is better for cables that are handled often. It bends better. Go with solid core cabling (More about Cat 5 on Wikipedia).
Jacks and the patch panel
All wire runs terminate at a keystone insert at one side, and the central patch panel at the other. Buy components that are rated for the category wire you decided to buy. For example, if you bought Cat 6 wire, buy only category 6 jacks.
The panel is simply a choice of how many wire runs you want to support. It's good to have a few spare jacks open for additions at a later time. You can buy multiple smaller panels instead of one big one. It really makes no difference. Stay away from integrated products like Leviton. They are needlessly price. You are paying for the design and name brand. The generic parts operate 100% as efficiently as the name brand parts.
The keystone jacks and faceplates are part of a system of the same name. Jacks supporting specific connectors snap into a generic faceplate with standard cutouts. Faceplates come with 1,2,4,6 cutouts. Empty slots can be covered with a blank keystone insert for later use. Buy as many faceplates as you need, and one Ethernet jack of the same rating as your wire for every run. Remember, the other end terminates at the patch panel.
The keystone jacks come in toolless and punch down form. Either one will work just fine. The later is the most common form. It requires the use of a punch down tool (~$10). Since these are the most commonly used jacks I decided to go with this type. The patch panel will most likely require the punch down tool as well. It's best to invest in one.
Network Layout
The network uses the home run design. All wire start at the central patch panel and run to a Ethernet outlet in other parts of your home. Locate the patch panel in an area of the house where it is out of the way. Since all wires originate from the panel, you should have easy access to the panel. You can't locate the panel in the attic. The router and other electronic that need to be located next to the panel will not survive the temperature swings. A dry basement is adequate.
Installation
Located the outlets in the rooms you want to install them in. Cut an opening for the new box and snake a wire to it from the path panel. This is done using the same techniques used for installing electrical wiring.
Once the wires are installed they need to be terminated at both ends. Strip the jacket off the last 1.5" of wire. This can be done with scissors. Rotate the scissors around the cable while applying gentle pressure. The scores the jacket. Pull the end off. The jacket will tear at the score line.
Untwist the wire pairs and trim off the plastic center divider. Notice that all 8 wires have a different color. They need to be inserted in the right slots at the patch panel and at the keystone jack. There are two patterns for this: A and B. You can choose either one as long as you use the same pattern at each end of the cable. Otherwise you will create a crossover cable (A->B, B->A) which is the wrong thing to install in your walls. The jacks are color coded to make this easy.
Once you picked a layout install the wires according the color codes on the jack and panel. It's just a matter of lining up colors. The punchdown tool secures the wires at the terminals. Push down on the wire with the tool. You will feel the wire snap into place when it is seated properly. Repeat for all runs. Install the keystone jack in the faceplates, and secure the path panel.
Connect your router to the patch panel using the patch cables you ordered. The router completes the circuit. Your Ethernet installation is ready for use.
Conclusion
The bulk of the work is installing the wires in the walls of your home. The technical parts are not complicated at all. Don't let that part dissuade you.


