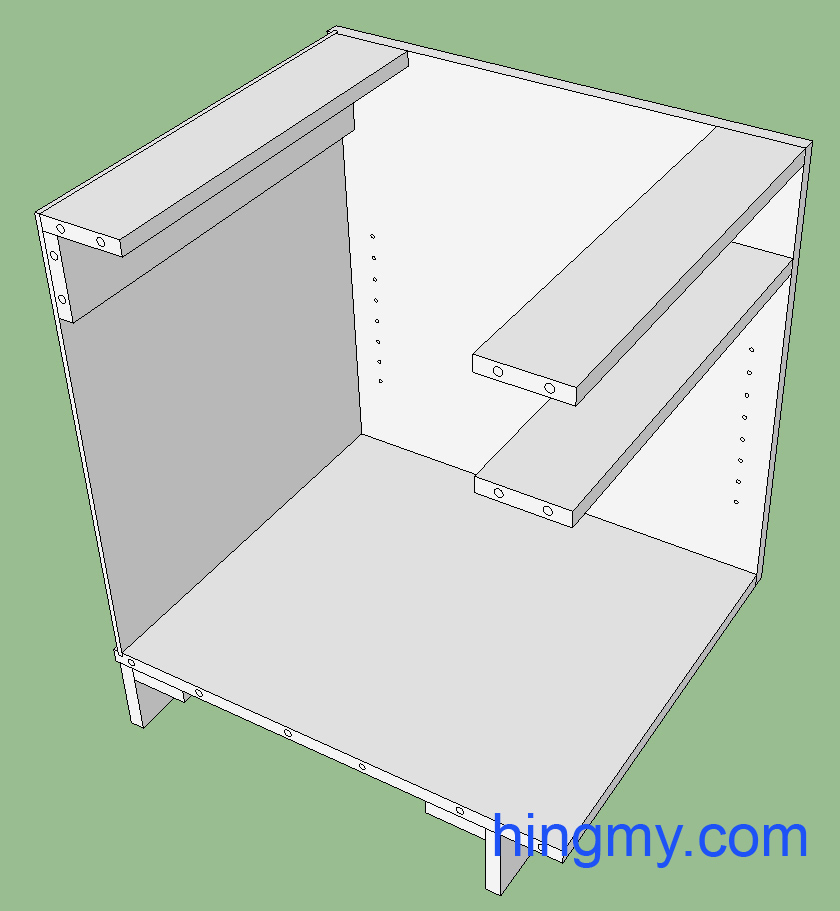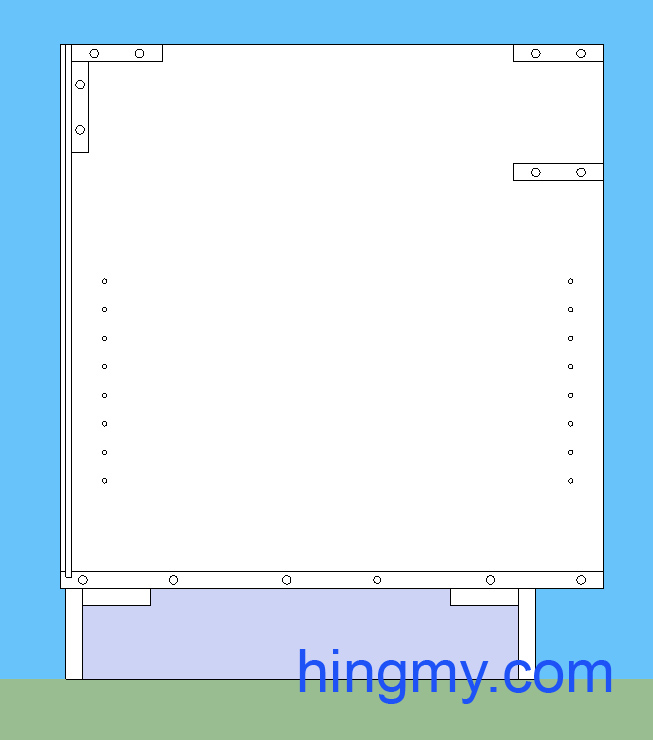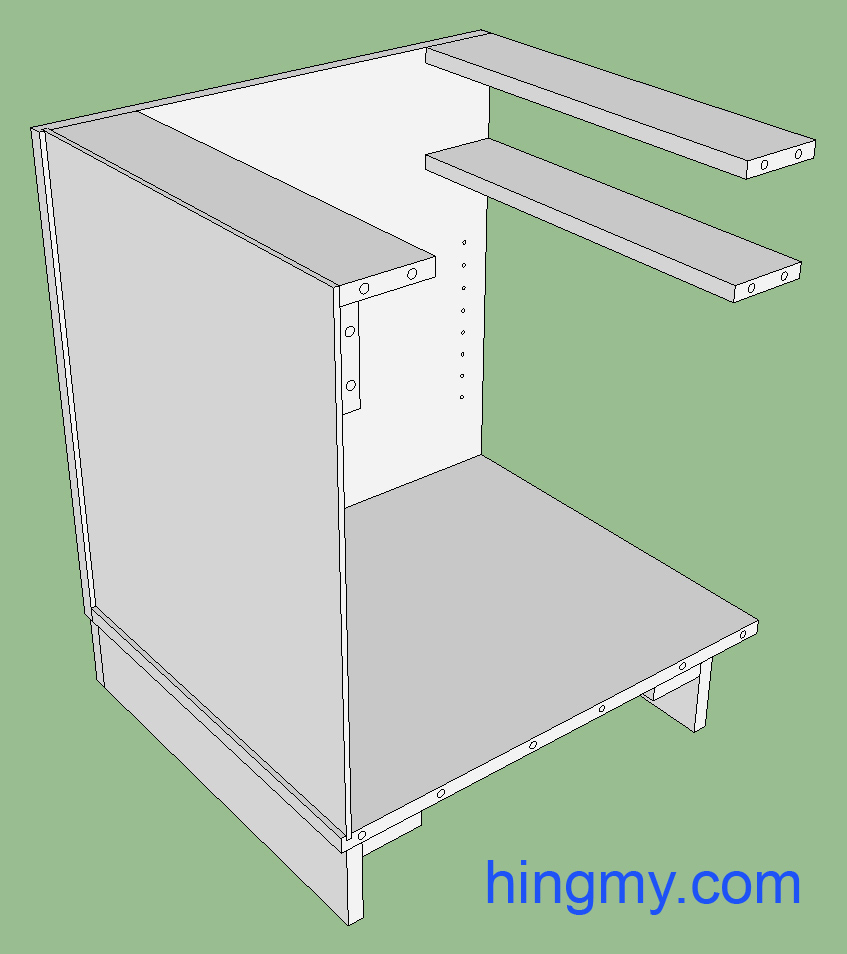
European style frameless cabinets are a common sight in modern kitchens across America. Originally designed to make kitchens cheaper, frameless cabinets are now considered to be modern and stylish. Let's take a look at what it takes to build a frameless cabinet.
The Basics
A frameless cabinet consists of an open-front box reinforced with rails and a thin back. All components of the cabinet have been designed to allow for fast and economical industrial production. Frameless cabinets are both sturdy and make economical use of materials.
The front edges of the cabinet are covered with edge banding instead of a faceframe. The doors of the cabinet are overlay doors with a small reveal between adjacent doors. This creates the "wall of panels" look that modern European kitchens are known for. The overlay doors also hide the somewhat unsightly front edge of the cabinet carcass when the doors are closed.
The pieces of the cabinet are held together with dowels. During assembly the dowel connections self-align all pieces. The back squares up the cabinet. While the dowels and glue are enough to hold the pieces together, screws can be used to further firm up the carcass.
The back is made from 1/4" material. It is installed in a dado in the bottom and sides. Some shops use a rabbet instead of the dado. This speeds up assembly, but results in a somewhat weaker final product.
The shelves are free floating shelves supported by European 32mm style pins. As the name suggests the shelf is supported by pins spaced 32mm apart vertically. The user can reposition the shelve by moving the pins to a different row.

Construction
In a cabinet shop the parts for a frameless cabinets are cut by a CNC machine. A single machine can produce enough cabinets to fill a whole kitchen in an hour. Since the parts come out accurate every time, the drawer slides and hardware can be installed before the cabinet is assembled.
In a small shop the work goes much slower. The process starts by cutting the pieces from a sheet of plywood. All pieces are square, which speeds up the process. A tablesaw is the best tool for this task. In a pinch a circular saw is a good substitute.
Without a boring machine in the shop accurately locating and drilling the dowel holes is the most difficult task. The best way to do this is to use a dowel jig. Built epically for this purpose a cabinet maker's dowel jig accurately positions the dowel holes in all parts.
If a dowel jig is not available, biscuits can be used. The resulting joint will be as strong as the dowel joint, but the pieces lose their self aligning property. A biscuit joint can move a small distance laterally.
A third alternative is to drive screws through the sides into the rails and bottom. This results in a very strong joint, but leaves visible screw holes on the outside of the cabinet. Since the sides of all but the last cabinet in a row are hidden, using screws is a very good option for the small shop woodworker. The screw holes must be pre-drilled and countersunk to avoid splitting.
The dado for the back is best cut on the tablesaw with a dado blade. If a dado is not available, several passes over a regular blade accomplishes the same task. The back is glues into place during installation. A few screws driven though the back into the top rail further increase the rigidity of the carcass. During assembly the back must be seated properly all around for the cabinet to be square.
The holes for the shelf pins are drilled with a shelf jig and a power drill. The distance and layout of the holes is determined by the pattern. It's the cabinet maker's task to properly position the pattern to create usable shelf height options.
The edge banding for the front of the cabinet can be purchased from woodworking supply stores. The most commonly used type comes with hot glue applied to the mating surface. The banding is installed with an iron and an edge banding roller. The excess banding on either side of the panel is cut away with a special edge banding trimmer or a sharp blade.

Cabinet base
Frameless cabinets are installed over a floating, or separate, cabinet base. The base is built from the same material used for the cabinet walls. Since no faces of the base will be showing, screws can be used to hold the pieces together. A few short screw driven through the base into the cabinet bottom connect the base to the cabinet.
The base does not have to be attached to the carcass in the shop. Having a separate base makes leveling the cabinet on the job site easier. On the other hand, cabinets attached to their bases cannot be separate for each other on their way from the workshop to the job site. Losing pieces in transit becomes impossible.
If a kitchen plan is available, a single base unit can be built to accommodate two or more cabinets. This practice speeds up installation significantly. It's easier to properly position and level a single, large base than it is to connect and place several small ones.
Summary
Frameless cabinets are a blend of form, style, and function. Constructed from as little material as possible, a frameless cabinet is durable, easy to construct in large quantities, and fully functional.
When built by a small shop without a CNC machine frameless cabinets lose much of their economic properties. A good frameless cabinet can still be built with basic tools shop tools and a table saw.


