Everyone has heard the old saying: "You can never have too many clamps". While I am sure this statement is not true at the extremes, it still seems like I have to use every single clamp I own at one time or another during a project.
Clamps are one of the most frequently used tools in the shop. It's only fitting store them in a prominent place in the shop. Here is my design for storing my simple collection of parallel jaw clamps.
The Design
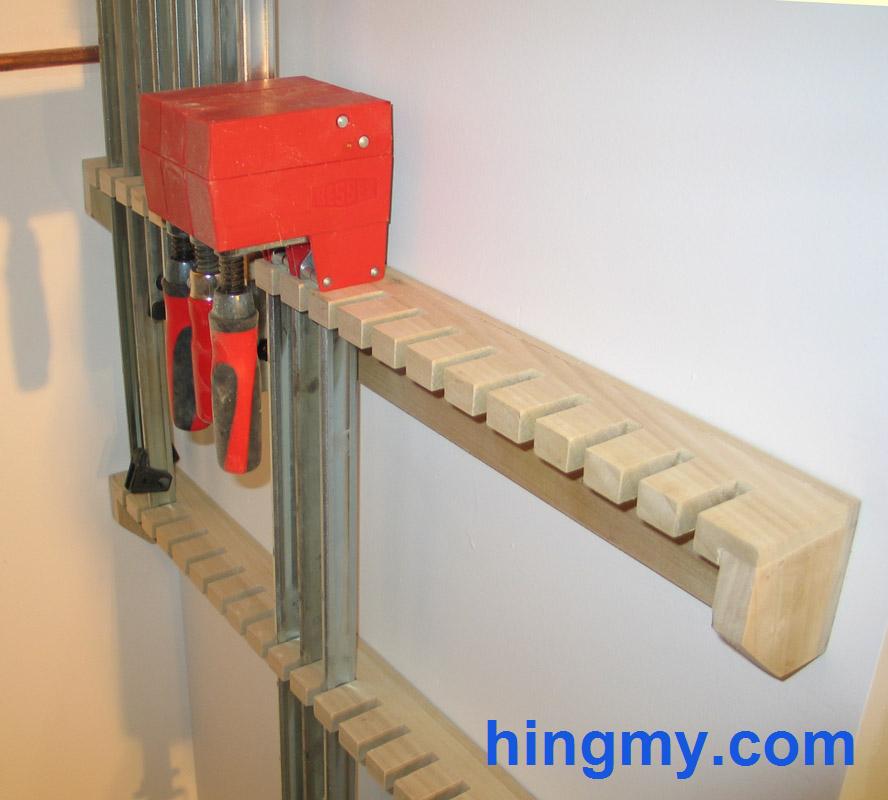
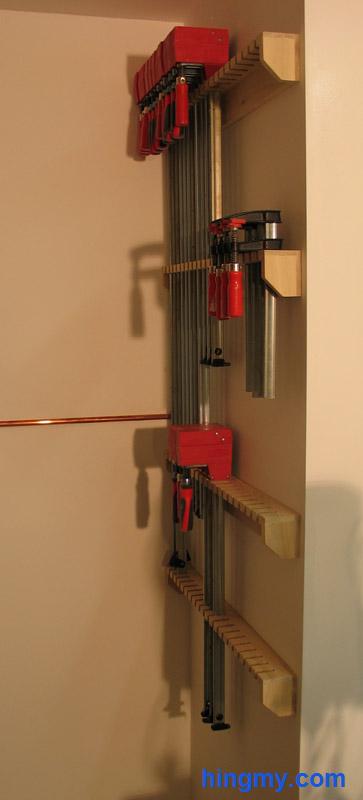
I recently added a closet to my shop to keep the dust off the compressor. This has created new wall space for me to use. One of the corners now houses clamp rack. The rack consists of 4 identical brackets made of poplar. Each bracket has slots to receive the bar part of each clamp. The head of each clamp rests on the top bracket. The other end of the bar rides in another bracket. Each clamp is held securely about 1/2" from the wall.

Since the slots in each bracket align vertically, one clamp can be held in place by multiple brackets. The 4 brackets should be spaced on the wall such that it is possible to store two of your shortest clamps above each other. Longer clamps will take up 3 or 4 brackets. The shorter ones can be stacked.
For this design to work, it is important that the slots line up perfectly. The easiest way to accomplish this is to gang-cut the brackets on your table saw. Any slight variations in the slot spacing will be the same on all brackets. Your clamps will still fit perfectly.
I sized the slots such that each clamp cannot touch the wall and cannot fall out on its own. The rack also uses space efficiently. The gap between clamps on a fully loaded rack is 1/16".
Choice of material
A hardwood is a better choice for this rack. The fingers can become brittle, if they are spaced too close together.
My clamp rack is made from poplar. I broke two fingers off by accidentally twisting the clamps while taking them out. A hardwood like oak does a better job at resisting abuse.
Construction
The top piece takes most of the work. The slots are cut on the tablesaw with a dado blade. To speed up production, I made an index mark on the mitre gauge. Cut a slot; move one edge of the newly cut slot to the index mark; cut the next slot. That way the slots are spaced evenly.
Cutting multiple pieces at a time will ensure the slots line up perfectly. If you have a bandsaw and a planer, you can make the slots in a block of wood, and resaw the block into strips on the bandsaw.
The sides of the rack are simple corner blocks. They can be attached with a simple butt joint. For stability a dado joint can be used.
Glue and nails hold it all together.
Summary
The rack has made a great impact on my workflow. Gone is the clutter of clamps in the corner. The clamps are always at hand. Work gets done faster and glue-ups have become less stressful.


