There are many options for joining a drawer front to the sides of the drawer. Let's take a look at all of them and examine their strengths and weaknesses.
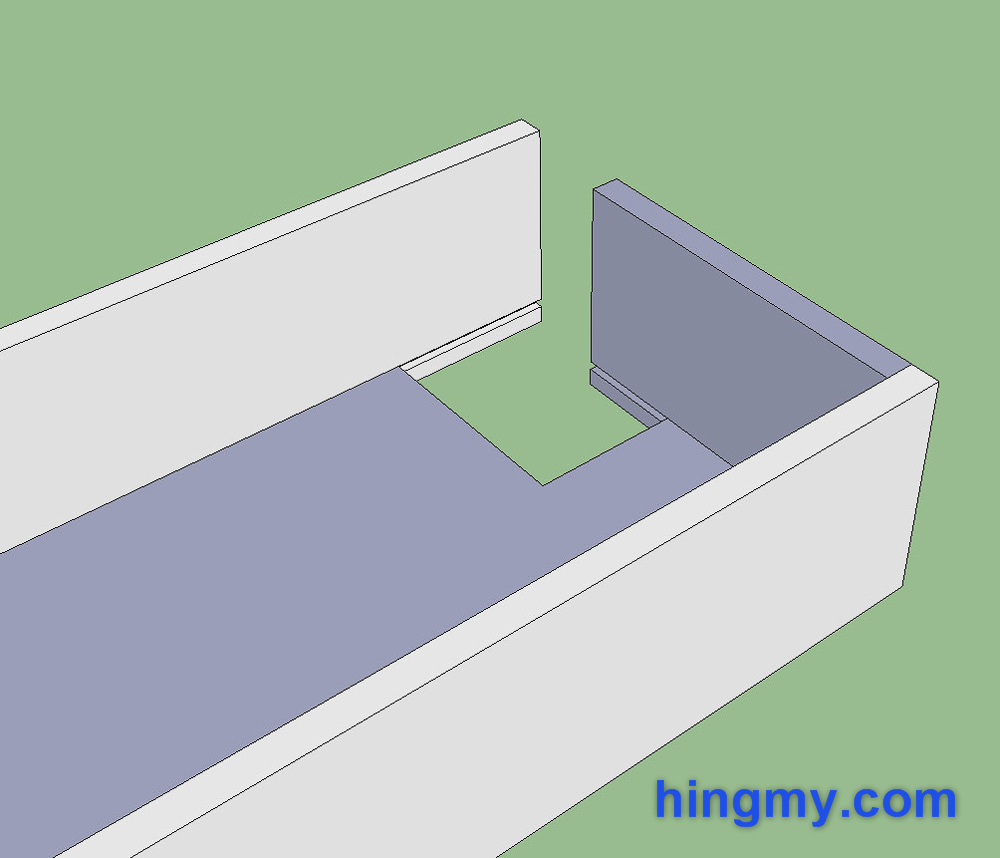
Butt Joint
The butt joint is the simplest of all drawer joints. The side are connected to the front with glue only.Due to the small contact area and having to glue end grain, the butt joint is the weakest of all drawer joints.
If nail holes are not an important esthetic consideration, the joint can be reinforced with brad nails. With screws the butt joint approaches the strength of the more complicated joinery options.
The butt joint is a popular choice for economic drawers. It does not add a machining step to the manufacturing process of the drawer, and has a very low reject rate.
The assembly process requires some care, since the butt joint is not self aligning. The pieces of the drawer must be aligned precisely for a tight fitting joint.
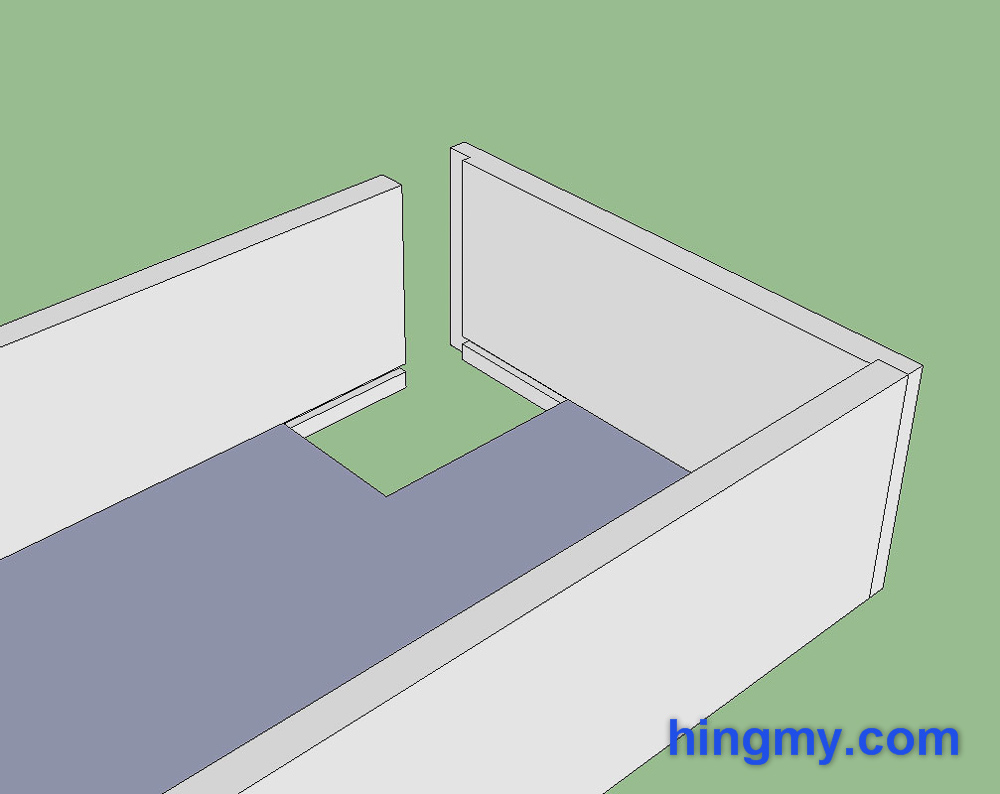
Rabbet Joint
The Rabbet joint adds a simple rabbet at each side of the drawer. This simple modification adds significant strength when compared to the butt joint. The additional gluing surface adds lateral strength.
The joint can be reinforced with nails or screws driven through the front panel. The holes for the fasteners will be covered once the faceplate is installed.
The Rabbet joint adds a single router operation to the process. A rabbet bit is used to cut the rabbet on each side of the drawer front. Only one machine setup is necessary.
The rabbet joint is self aligning during assembly. Clamping along both axis of the drawer is required for a tight fitting joint.
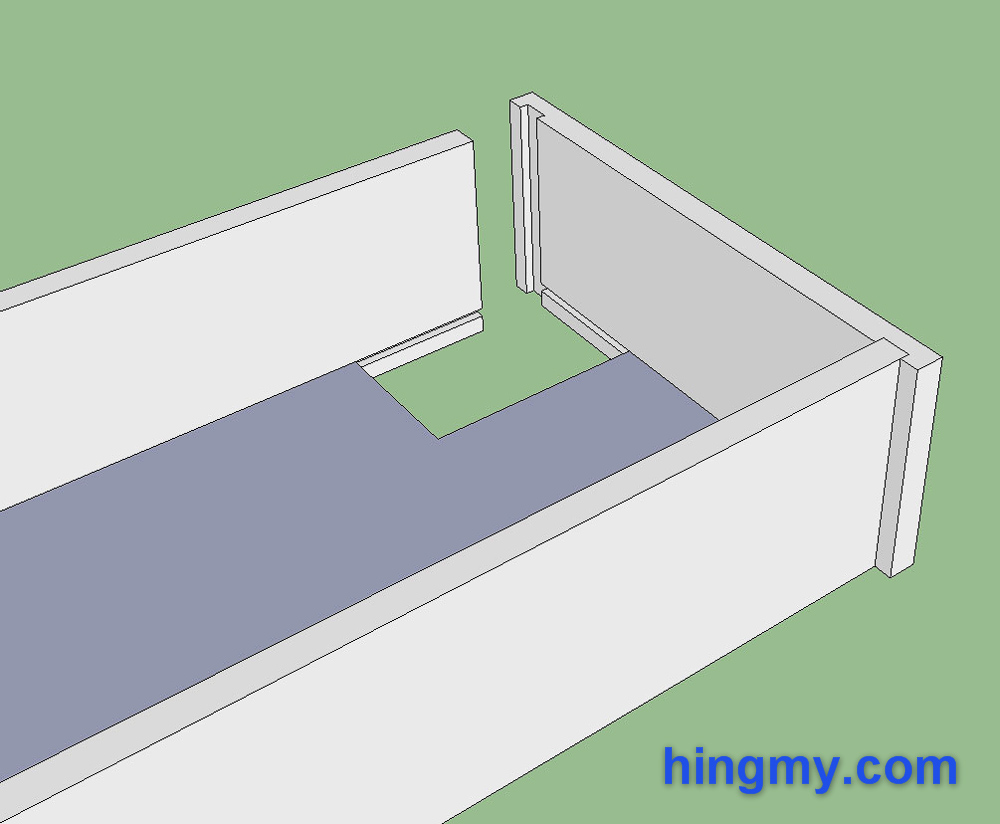
Dado Joint
The Dado joint is a better version of the rabbet joint where the width of the front panel is not an important consideration. The dados cut into the front panel grab the side pieces fromboth sides. This results in a very strong joint. Nails or screws can be used to further increase the strength of the joint.
The dado joint is as complex to make as a rabbet joint. The only difference is the setup used when cutting the dado. The fence is set back about 1/2" to create the gap.
The dado joint is self aligning during assembly. Clamping is only required in the direction of the sides.
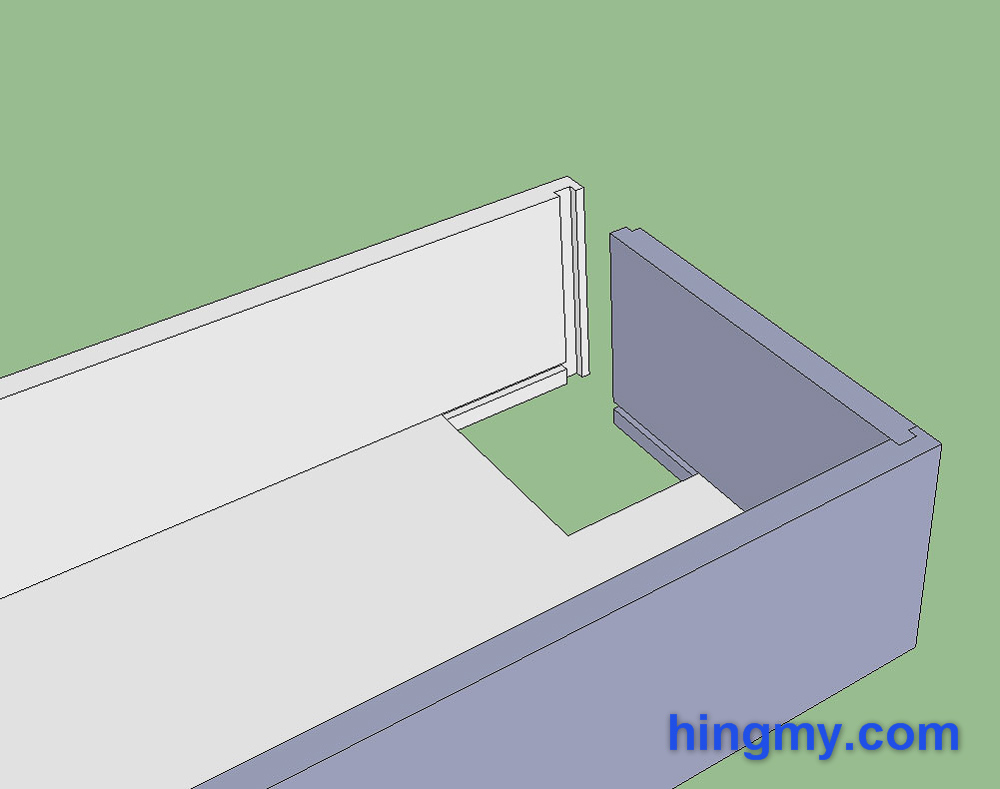
Rabbet and Dado Joint
The rabbet and dado joint is a combination of the rabbet and dado joint. This type of joint creates large gluing surfaces oriented along both axis of the drawer. The result is a joint that is much stronger than a dado or rabbet joint.
The joint is made with two passes across a rebating bit. The sides receive a dado along their front edge. The front requires a rabbet at each end to reduce its thickness to that of the dados in the side pieces.
The pieces of the joint lock together during assembly. Clamping along both axis of the drawer is required.
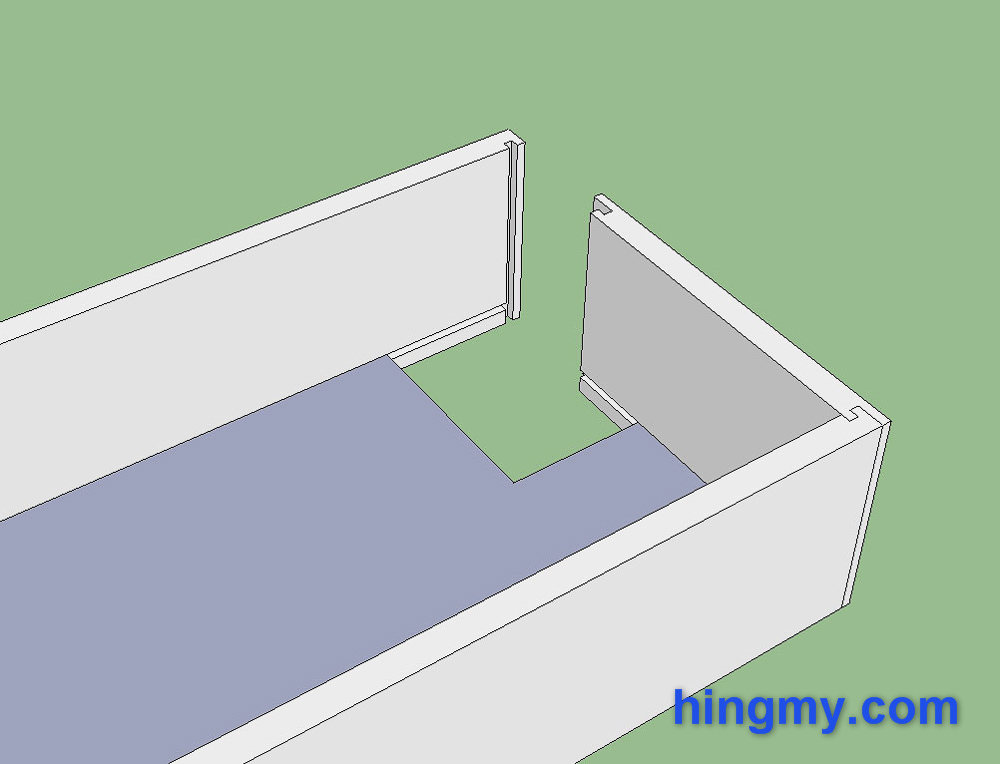
Drawer Lock Joint
The drawer lock joint is a natural evolution of the rabbet and dado joint for the machine age. It uses the same principle of maximizing glue surfaces to create a very strong joint.
The lock joint is cut on a shaper using a special cutter. The sides are cut feeding the pieces along the tabletop of the shaper. The front is cut using the exact same shaper setup and bit. This time the piece is feed through the machine vertically along the fence. This relatively simple machining step makes the lock joint a favorite among industrial cabinet makers. The process can be automated with a very low reject rate.
During a assembly the lock joint fits together like a lock and key. Clamping is only required in one direction.
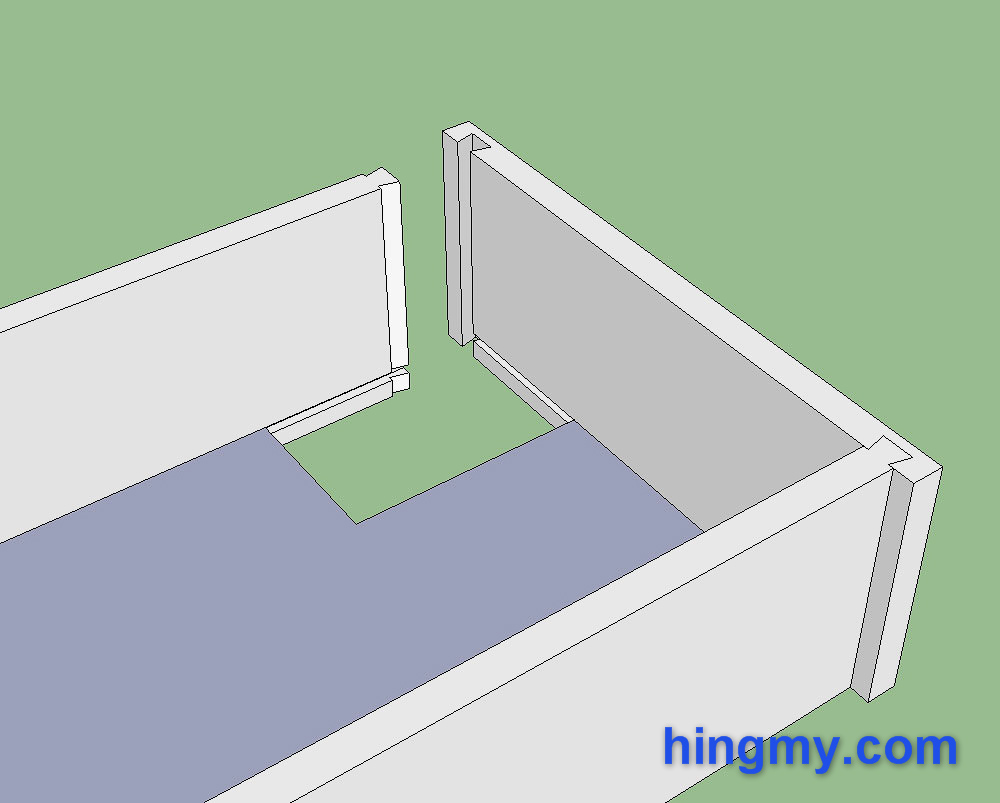
Sliding dovetail
The sliding dovetail uses a single dovetail along the front of each side. This dovetail slides into a matching rabbet in the front of drawer. The sliding dovetail joint is mechanically sound without glue or nails. When properly cut the sides are self aligning and self squaring.
The joint is machined with a dovetail bit on the router table. The dados in the front piece are cut in the first operation. The dovetail at the end of the sides pieces are formed in the second operation. Two passes are required for each dovetail. The operation requires care and precision in order to produce pieces that fit tightly.
Due to the friction created when inserting the sides into the front piece, the sliding dovetail can be difficult to assemble. Slight variations in the material's thickness than result in a piece binding. Because of this difficulty the sliding dovetail is rarely found on industrial cabinets.
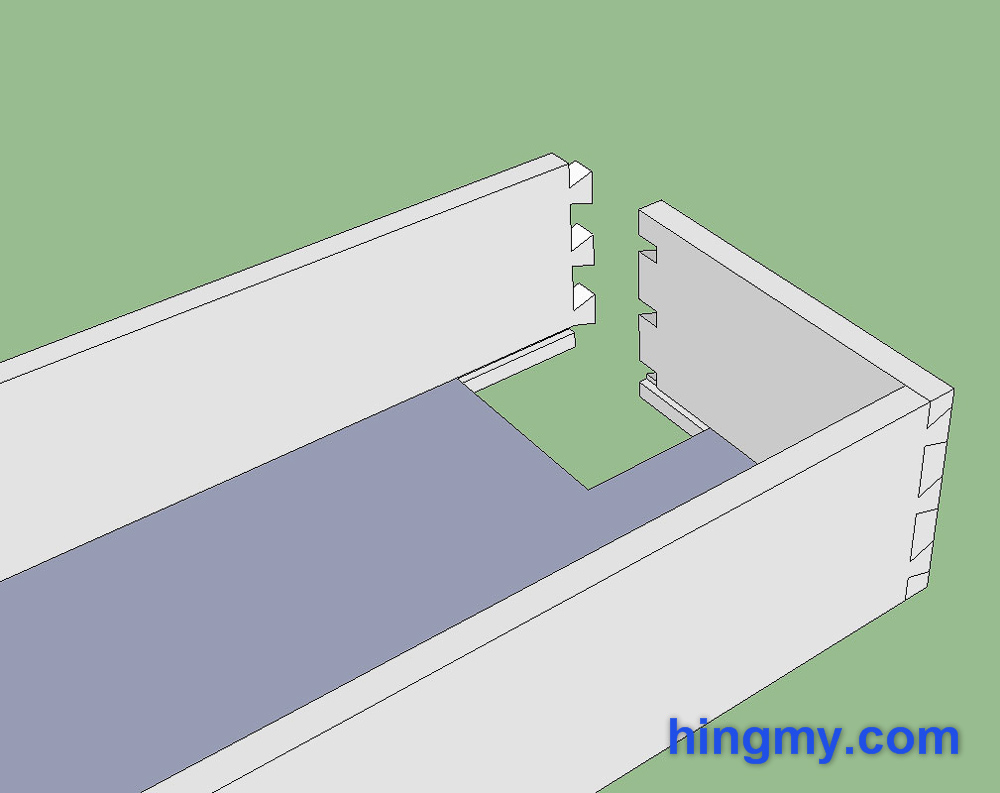
Through Dovetail Joint
The through dovetail joint is the pinnacle of fine joinery when it comes to drawer. The dovetail joint used an interlocking pattern to create a joint that is self aligning and mechanically sound without glue. Producing the joint requires high precision. The distinct dovetail pattern is a mark of quality at the front edges of a drawer.
A dovetailing jig or machine is used to cut the joint. Once set up these processes are repeatable and accurate. Hand cut dovetails are found of high quality furniture.
A dovetail joint requires clamping in both directions of the drawer. Once the glue dries the dovetail joint's strength is second to none.
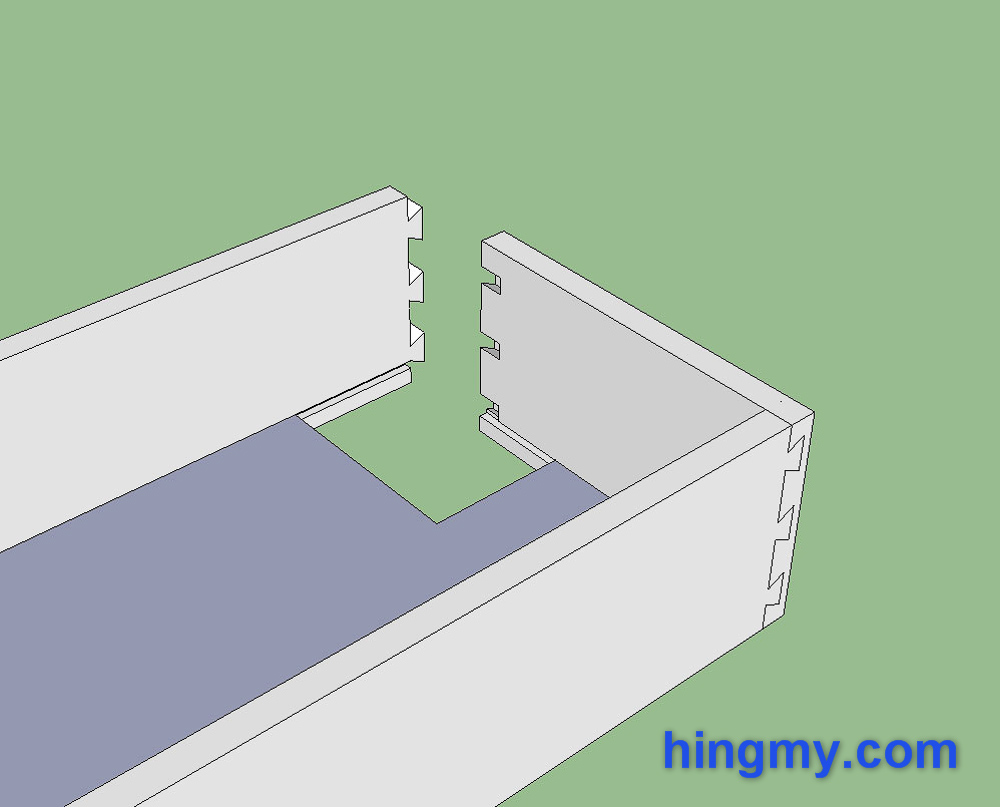
Half-blind Dovetail Joint
The half-blind dovetail joint hides the end grain of the side pieces that would be showing when a through-dovetail joint is used. It is most often found on inset drawers that do not have a separate drawer front.
The half-blind dovetail joint is made using the same process as the dovetail joint. The setup of the machines used varies slightly. Hand cutting a half-blind dovetail is significantly harder than making a through-dovetail joint.
The joint is self aligning during assembly. The drawer only needs to be clamped in one direction.
Box Joint
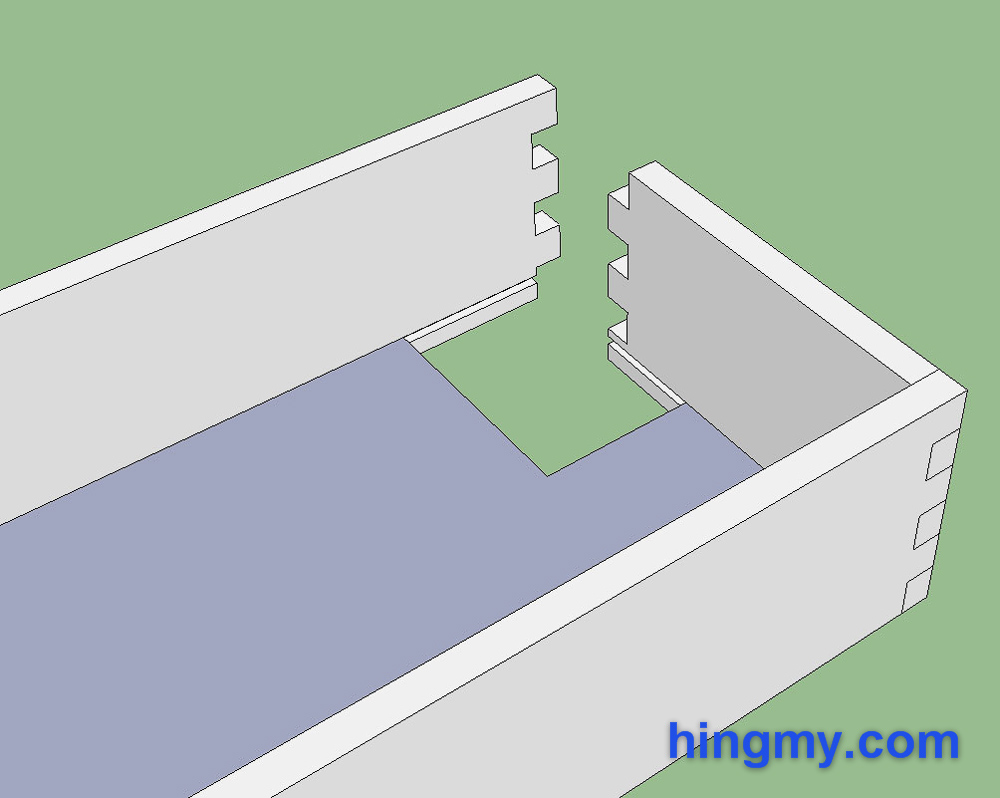
The box joint is a dovetail joint with square pegs. It is weaker than the dovetail joint, but considerably easier to machine. during assembly the joint is self aligning. Clamping in both directions of the drawer is required.
The box joint is cut with dado bit mounted in a router and a dovetail jig. The mechanical complexity of this operation is identical to that of a dovetail. Automated dovetailing machines can be used to cut box joints.
Summary
All of the joints presented in this overview have their strengths and weaknesses. As strength increases as do joint complexity and reject rates. Your choice of joint should depend on the expected use and lifespan of your project.
Use simple joints for drawers that won't hold much weight. Step up to the more complex joints for heavily used drawers or heirloom projects.


